


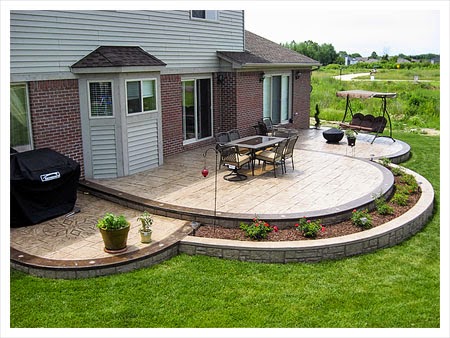
Concrete patios area unit sturdy and, with some landscaping imagination, will complement garden, entrance or different landscaping. Some like this material as a base for bricks, however if designed creatively, concrete patios are often engaging in their claim. though there is exertions concerned, this is often an acceptable project for beginners to tackle.
Difficulty: arduous
Time Required: three days
Here's How:
Building concrete patios needs some designing. Purchase materials and tools previous time, and rent automatic machine. Concrete calculator: to hide fifty sq. ft., 6 in. thick, you wish twenty five baggage (pre-mixed, to expedite the project).
Excavate with a garden shovel. within the North, 6 in. 2 of those inches area unit for a bottom layer of gravel and also the different four for the concrete. The gravel layer is supposed to stop your concrete area from cracking throughout the freezing-thawing cycle. check that you determine a grade that slopes off from the house, for runoff. you'll be able to confirm the grade by inserting stakes at the high finish (up against the house) and low finish of the excavation, then hanging a string between them. A line level placed on the string can indicate the current grade. Excavate therefore on find yourself with a slope of regarding one in. for each four linear unit.
Build a kind to carry the gravel and concrete. Sink kind into the realm excavated for the concrete area. the highest of the shape ought to be level with the bottom, if you would like the concrete area to be flush with ground level.
Install gravel, tamping it down firmly. Install two in.-high flat items of rock (rid your garden of some rocks!) as supports for rebar reinforcing, that you need to build or so within the middle of the four inch-thick concrete block.
Install reinforcing rebar to unify the block. create a grid by putting them at each 2 feet each from front to back and from left to right of concrete area. Unite them with wiring at intersections.
Mix concrete in rental automatic machine, 1st adding water with a hose to the mixer, then concrete, then water once more -- till combine becomes the same, shiny medium grey.
Pour concrete, beginning at finish farthest from wherever your mixer is, building a ramp if necessary. Add filler rocks as you go. Pour as quick as attainable. Preparation is crucial here.
Use a screed to level the surface of the concrete, slippy the screed on the highest of the shape boards. Pull the screed from one finish to the opposite, drawing excess concrete.
Cut initial management joints in concrete area at regarding each 3-4 feet with a trowel (not a garden trowel), 2 in. deep. to realize a straight cut, place a board across your forms at right angles to use as a guide.
Look for a watery layer to look on the surface of your concrete (which is claimed to "bleed" because it settles). when this watery layer seems, sit up for it to disappear before continuing.
Use a float to even out any lumps on the concrete area. Sweep it in Associate in Nursing arc-shaped motion, keeping the sting at the front of your sweep slightly raised, lest the float penetrate the concrete.
Finish the management joints begun in Step nine. Use a woodworking plane to create a clean groove, about 1 in. deep (or 1/4 the depth of the full slab). Re-use constant board as a guide.
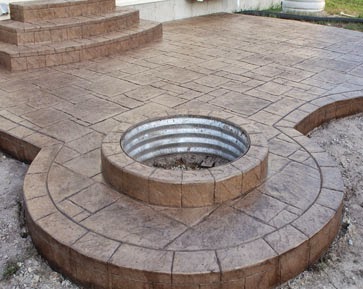
Finish the concrete area surface with style components. Running a pushbroom over the concrete area makes a style each engaging and practical: lines that offer visual interest and a slip-resistant surface.
Lay plastic over the new concrete area. Concrete should be "cured" properly. The key to hardening isn't rental it dry out too quick. By parturition plastic over the concrete area, you entice the wet at intervals. Keep the plastic on for per week. Concrete does not totally cure for three weeks, therefore even when you have removed the plastic, do not subject the concrete to undue stress. In terms of protection, wait time varies by product (follow the directions provided for your product).
If you anticipate that {there can|there'll} be an outsized quantity of water runoff from your area which this runoff will cause issues, you'll need to appear into having a system put in in your yard before building a concrete area. Once such Associate in Nursing overall system is in situ, you'll be able to concentrate on drain for your concrete area. There area unit drains meant particularly for patios, known as "linear drains," and these drains tie into the system for your yard.
Build Concrete Patios Tips:
Avoid skin contact with concrete, also as eupneic the mud. create use of gloves, movement boards, long pants, long-sleeved shirts, protecting boots, goggles, face masks, etc.
In my area, Home Depot rental incorporates a 24-hr. rate for automatic machines that's cheaper than the 10-hr. rate of smaller rental service stores. once doubtful, purchase further concrete. you do not need to seek out out that you are a bag short even as you are on the point of place the finishing touches on your masterpiece and also the concrete is commencing to harden!
If you would like to get bricks on the concrete block and find yourself with the ace of the bricks flush with the bottom, dig an additional two 1/2 in.-- 2 in. for the bricks and 1/2 in. for the mortar between the bricks and concrete.
If, in your dig, you come upon any stones, wash them and set them aside to be incorporated into the concrete. they're going to take up house and save on concrete usage. it is also an honest time to get rid of garden rocks.
If you are dig vi in., 2x6s create a perfect kind. however since their ace are going to be flush with the bottom, forestall rubbish from falling in on your project by covering the landscaping space with tarps.
What You Need:
- "pre-mixed" concrete
- automatic cement mixer
- gravel, screed, float
- four 2x6s, scrap boards
- nails, garden shovel
- rebar, wire
- garden hose
- trowel, jointer
- protective consumer goods, mask and specs
- line level
Written by: Oktavia Lee
Madamvia, Updated at: 3:59 AM
0 komentar: